Notify your Discord server when you go live on Twitch with AWS Lambda
If you run a Discord server to accompany your Twitch stream, you probably have a channel dedicated to letting people know when you're livestreaming. Twitch notifications are infamously flaky, partially down to Twitch's dodgy "smart notification" algorithm that tries (and often fails) to determine which device the recipient is active on to send a notification, as well as Android devices "optimising" notification delivery.
There is an array of free tools that provide this functionality, namely the insanely popular MEE6, Streamcord, and Lyvego. However, I don't want to use MEE6, and the other tools have a tendency to send out notifications way too late. Additionally, these notifications aren't super customisable in terms of what text is shown. To fix this, I set about to create my own version of these tools. In this article, I set out how I made Goli and how, as a streamer, you can use the script I made for better Twitch notifications.
Update (March 2022): You can now use Serverless to deploy Goli to Lambda, skipping steps 3 thru 6, by following the instructions in this GitHub repo.
Goli's brains
Goli, short for Go-live, is based on Webhook technology. I had heard about webhooks before starting this, but didn't really get how it works. In reality, they are super simple. It's an endpoint that takes data via HTTP POST and has a/multiple side effects, and optionally provides a response. Goli consumes a Twitch webhook and sends data to a Discord webhook:
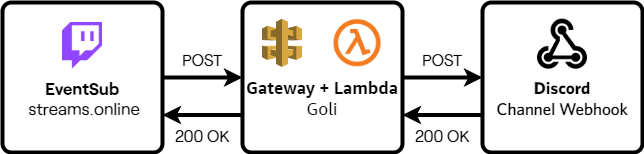
To make my own webhook reciever (and sender), I used AWS Lambda. This use case easily falls under its free tier, unless you are streaming more than a million times a month (and I would be very impressed if you are.) Lambda processes incoming data from Twitch, pings the Discord webhook and returns a status object for debugging. To make the lambda script publically available, I set up an API Gateway that acts as the Lambda's interface.
The script that's run on Lambda is available in this GitHub repository. I use this repo, rename env.example.py to env.py and set the environment variables, install its dependencies locally, then zip it and upload it to AWS as described in this documentation. The lambda-function.py file contains the function: it does some data validation, creates the discord message object using incoming data, then creates a POST request. There's also some handling for other data sent its way, namely verification challenges.
The structure contents sent to Discord are described in this helpful website from Birdie0. If you want to extend or customise your Discord message, use this website to find out how!
Implementation
Right, here's the bit you care about. To implement this in your Discord, there are some prerequisites:
- A Discord Server you have admin access to, or own
- An AWS account - if you don't like AWS because it's Amazon, so is Twitch
- A Twitch account, obviously
- A computer with Python 3 installed on it
- An API client like Postman or Insomnia
This tutorial should take about 30-45 minutes from downloading everything to having a bot that will send messages when you go live. You may need minimal programming experience. If you have any feedback or questions please let me know :)
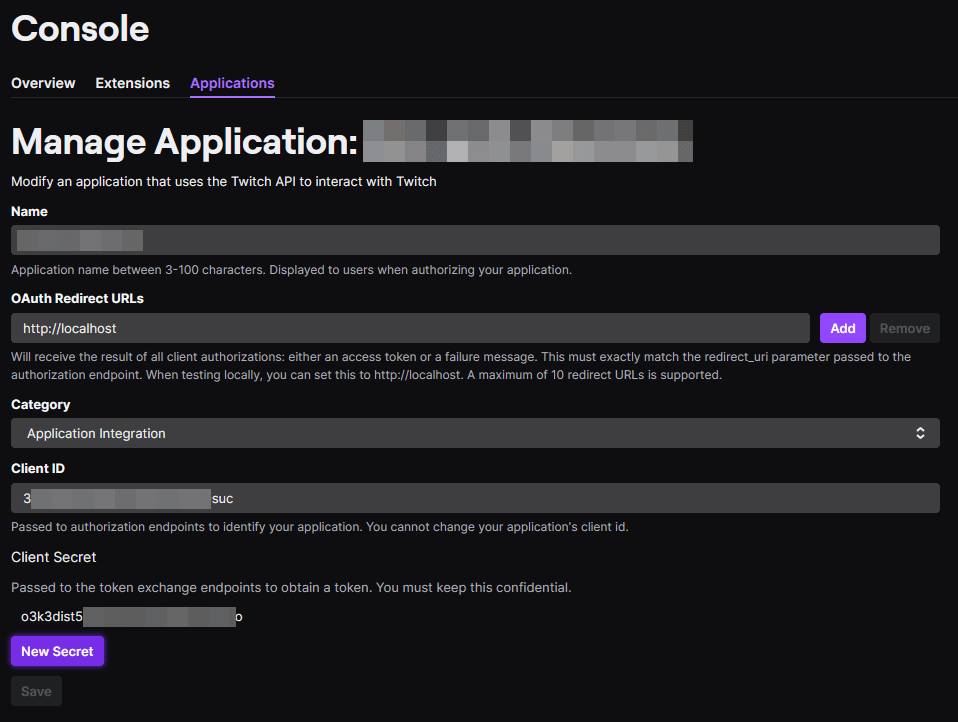
- To get started, let's set up your accounts. Create a Twitch Developer app with any name and a Oauth Redirect URL of
http://localhost. I selected the category 'application integration' because it's technically integrating with Discord. Create and store a client secret for later by clicking 'new secret' on the app's detail page.
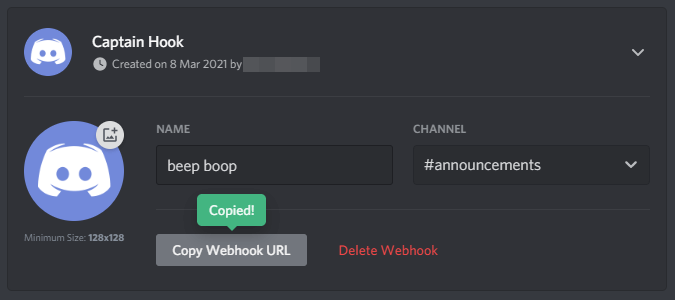
- After you've stored that somewhere safe, let's create the Discord bot that will share the go-live message. Go to the server settings of the Discord server you manage, click on the integrations tab, select 'webhooks' then click the new webhooks button. Pick your title, avatar and the channel you want it to post to. Then click 'copy webhook URL' and keep it somewhere safe.
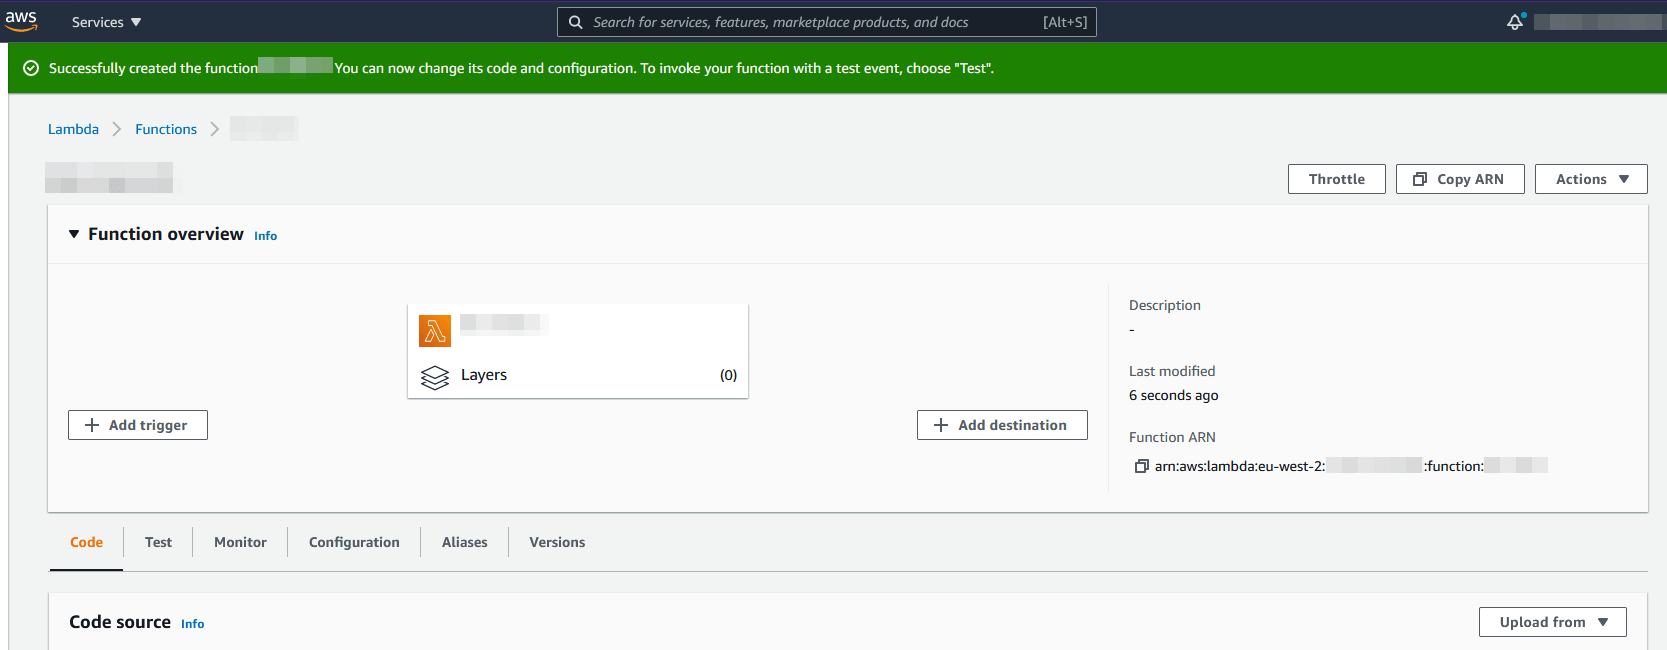
- Finally, let's set up the environment for the code to run in. Log in to your AWS console, and in the search bar at the top, search for Lambda. Lambda is the product that lets us run code instantly. For the purposes of this tutorial, we are using the updated console preview. Click 'create function', then select 'Author from scratch'. Pick a name for your project, and for runtime, pick the first Python version under 'Latest supported'. At the time of writing, this is Python 3.8. Click 'create function' at the bottom right. You should see something like this.
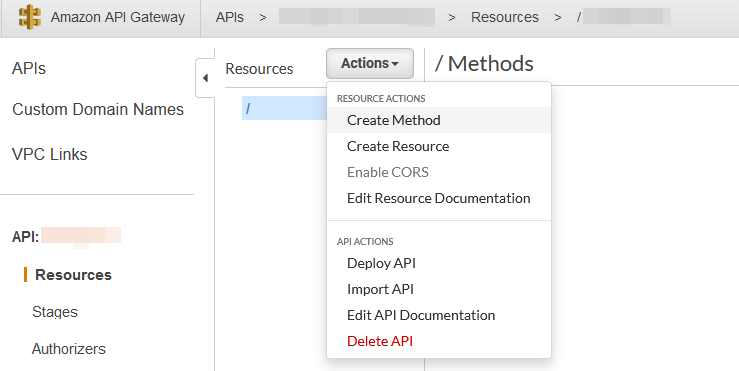
- Staying in the AWS console, let's configure the tool that will let us access the Lambda function on the internet. In the search bar, search for API Gateway. Click 'Create API' then select 'Build' from under 'REST API' (the name for the basic technology that lets us get data from Twitch). Don't select 'REST API (Private)'. On the 'Create new API' page, choose 'New API' and pick a name for the API. The description and endpoint type can stay the same. Click on 'actions' and then 'Create Method'.
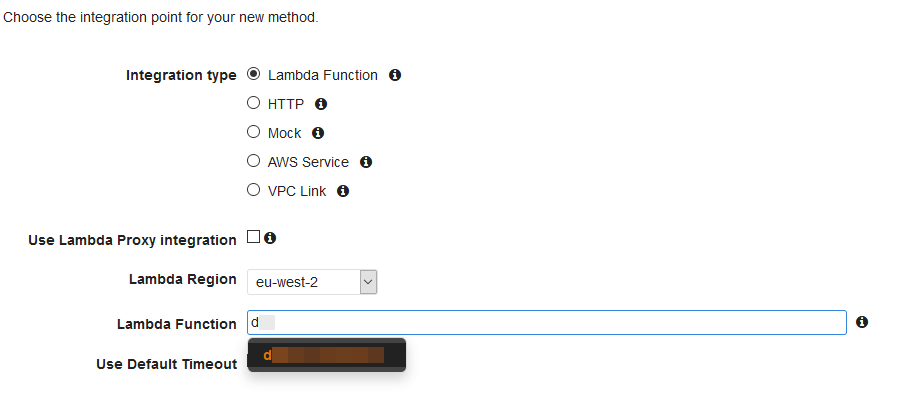
I know this step is complicated but stay with me here. A little pop-up will appear next to the menu, select 'POST' (as that is the type of request we need to handle), then click the little tick that appears next to the pop-up. A page titled 'Choose the integration point for your new method' will appear, leave everything as default except for 'Use Lambda Proxy integration', this must be ticked. It passes the information from Twitch to your code. Now search for your Lambda function in the lambda function section. Select it, then hit save.
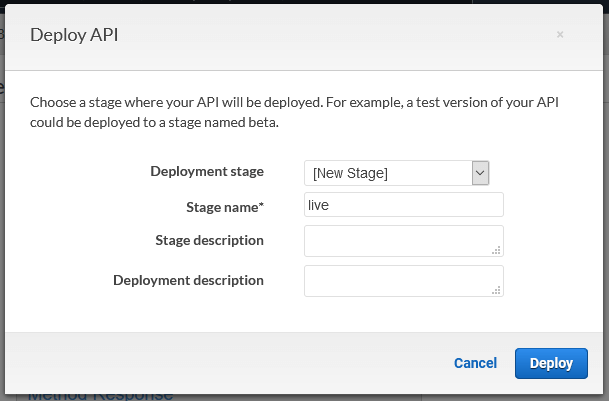
- To finalise the API Gateway we just set up, click on that actions menu again and this time select 'deploy API'. In the deployment stage pop-up, select '[New Stage]' and give the stage a name like so. The name is part of the URL so don't choose something weird. Click deploy. You'll then see a link next to the words 'Invoke URL'. Copy this URL for later.
- Download the code from the code repo, open a console in the directory you have the code in, and run
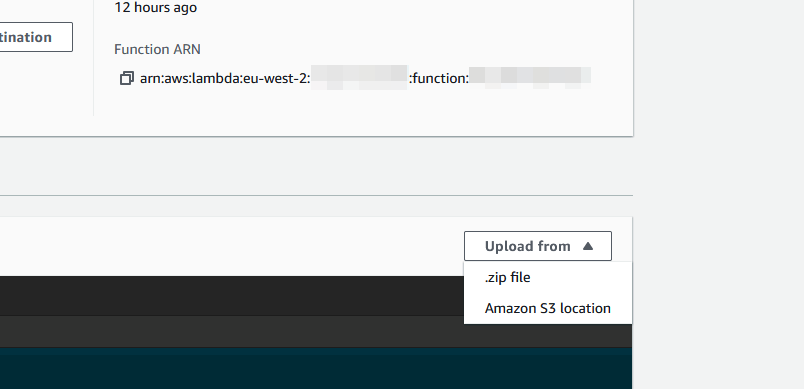
pip install --target . -r requirements.txt- this installs the required packages to make the script work. Rename the fileenv.example.pytoenv.pyand replace the empty quotes with your Discord webhook URL you saved earlier, your Twitch username and the ID of the Discord role you want to @. Create a zip file of all the contents in the folder after that's run, go back to your lambda control panel and in the 'code source' section, click 'upload from' -> '.zip'. Select your zip. Your code is now set up!
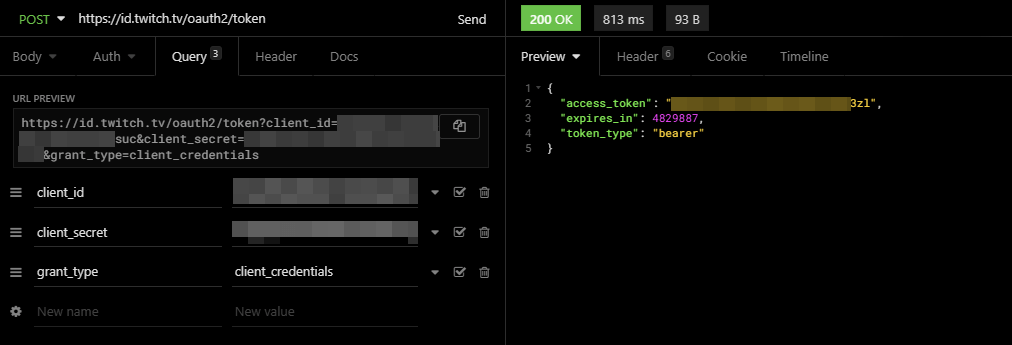
- Now to we need to tell Twitch to communicate with your Lambda function. We're going to follow this setup guide from Twitch. First, though, we need to use the Twitch app we made in step 1 to authenticate ourselves with the Twitch API. In our API client, make a new POST request. For this example we're using Insomnia, but any API client should work. The URL should be set to
https://id.twitch.tv/oauth2/token. Add the following query strings to the URL:
client_id- the client ID of your Twitch app, available from its dashboardclient_secret- the client secret you created and saved in step 1grant_type- should be set toclient_credentialsas that's the type of key you need
Click send. In insomnia you should see something like the screenshot below. Copy the access token you get back from Twitch, you'll need it for the next step.
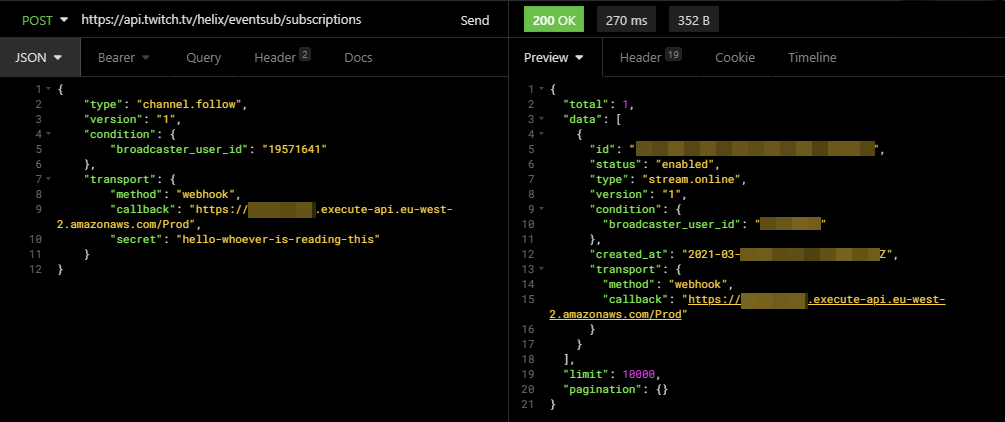
- Next, to create the subscription, let's make another request. It should be a POST request to the URL
https://api.twitch.tv/helix/eventsub/subscriptions. Configure a new header 'Client-ID' that has the value of your Twitch app's client ID, like in the previous step. Set up 'Bearer token' authentication (in Insomnia, click on the arrow next to the 'Auth' header and select Bearer), and enter the token provided to you in step 7 in the token field. Make sure the body type is set to JSON (orapplication/json), and copy/paste the following in the body, replacing the following parts:
broadcaster_user_id- the user ID of the streamer. You can find it using this useful tool from StreamWeasels.callback- the URL you copied in step 5. If you need it again, you can find it in the 'stages' section of your API Gateway.secret- a random string that you will need if you need to make any changes to this subscription. You should store the string you use here.
{
    "type": "stream.online",
    "version": "1",
    "condition": {
        "broadcaster_user_id": "<USER-ID-HERE>"
    },
    "transport": {
        "method": "webhook",
        "callback": "<LAMBDA-API-ENDPOINT-HERE>",
        "secret": "<SECRET-KEY-HERE>"
    }
}
It should look like this:
The script handles verification steps outlined in the Twitch documentation.
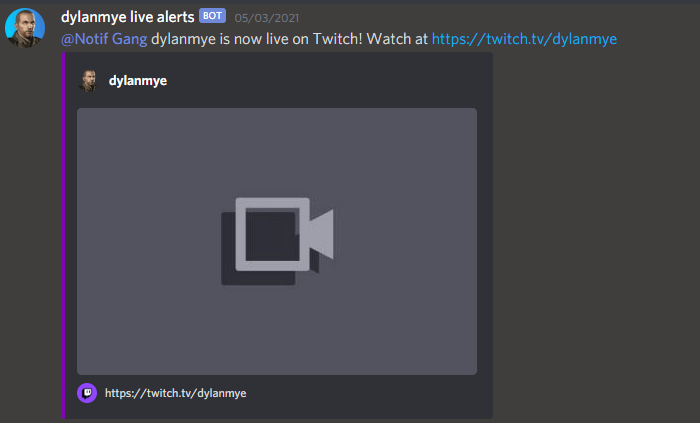
You're done! When you next go live, people with the notification role you specified should be pinged when you're next live, within minutes of you going live.
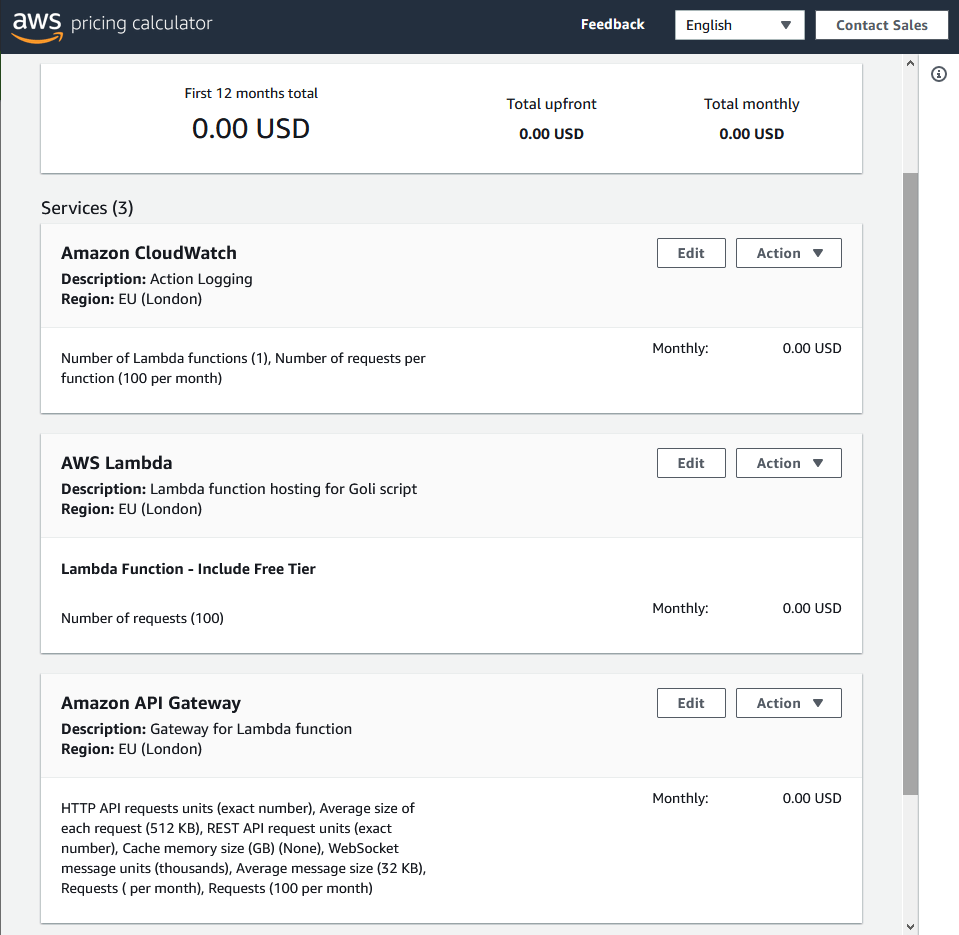
Costs
Thanks to AWS free tier, The biggest cost is your time. The estimated annual cost is a whopping $0. You can see the pricing calculator here, which assumes 100 'go-live' notifications a month.
Conclusion
Is it worth the effort to make your own Twitch notification bot? Probably not, unless you enjoy tinkering and learning how to do things on the cloud. Or if, like me, notifications are causing you issues. It can be a fun way to get stuck in to cloud services like Lambda, which can be really powerful for things like this where configuring and maintaining a server would take longer than development of the business logic itself. And it's even easier when it's free!
Updated 9 Dec 2021 to update links.
Updated 11 July 2022 to update links, add serverless link
